
Parts List
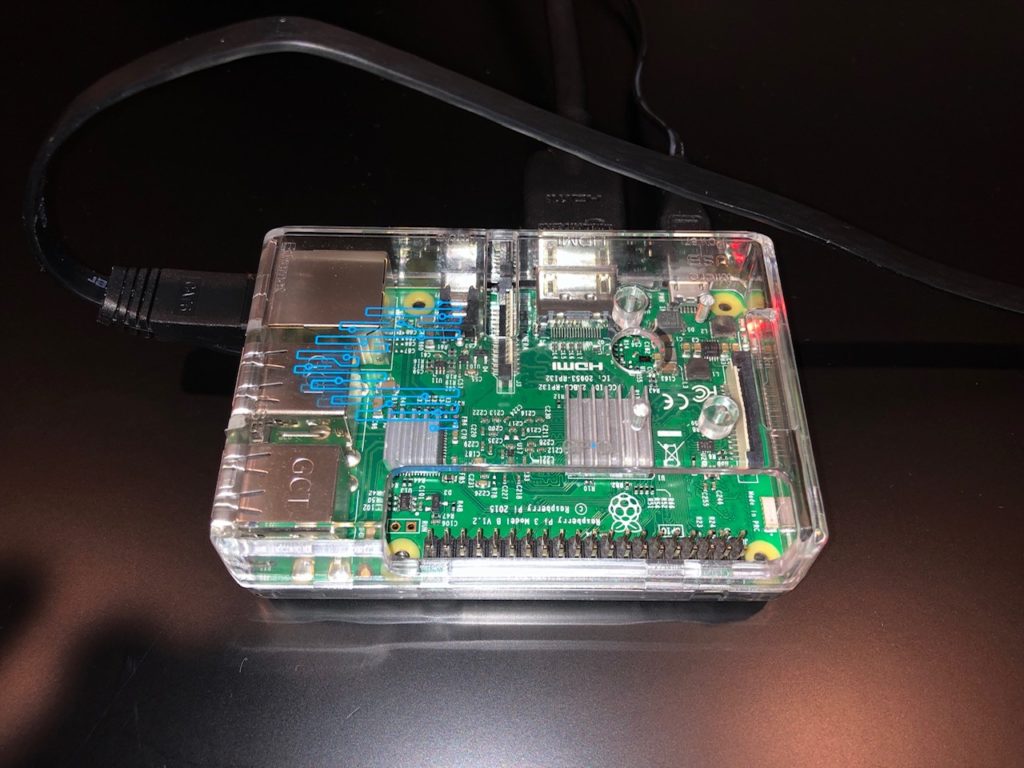
- Raspberry Pi 3 B+ (Please note, this demonstration does require at least a Raspberry Pi B + (also note, as of this tutorial release date (08/25/19) there is no stable Ubuntu distro available for Raspberry Pi 4 models).
- Samsung 512GB 100MB/s (U3) MicroSDXC Evo Select Memory Card with Adapter (MB-ME512GA/AM).
- Mouse and Keyboard.
- HDMI monitor.
- CAT-5/6E cable.
- MicroSD Formatter
- 1 TB External USB Hard-Drive
- MacBook or Windows/PC (Preferably a Hackintosh running Ubuntu Desktop : )
Download and Install Ubuntu Desktop 18.04
The most efficient way to run Bitcoin on a Raspberry Pi 3 B or Raspberry Pi 3 B + is to download a full-node (the entire copy of the Bitcoin ledger) via the Bitcoin Client on another computer or laptop; a LINUX-book or Hackintosh as demonstrated in this tutorial isn’t necessarily required- the Bitcoin client can also be downloaded on a Windows PC (please ensure that the recommended laptop has >= 500 GB of disk-storage because as of this post, the Bitcoin Blockchain is almost 238 GB). For the sake of convenience, please feel free to follow along in another BucephalusDev series tutorial How to Download and Install Ubuntu 18.04 File on a Computer (Download the 19.04 ISO file instead of 18.04) . This is discussed in the above screencast released on the week of 09/02/19.
Both the Raspberry Pi 3 and the Raspberry Pi 3 B+ aren’t equipped to download after running the one-liners for the entire full-node beginning with the first transaction-block- so assuming you’ve downloaded the full-node on another computer (which will take about 6 hours from a fiber Internet-connection), you must locate the “blocks” and “chainstate” folders within the Bitcoin Client directory- in this tutorial, the path were
home/alexanderjsingleton/snap/bitcoin-core/common/.bitcoin/blocks/home/alexanderjsingleton/snap/bitcoin-core/common/.bitcoin/chainstate
so to access these directories, run:
-
/home/alexanderjsingleton/snap/bitcoin-core/common/.bitcoin
both of which are to be copied over to the 1 TB Seagate external USB hard-drive by running:
sudo scp -r /home/alexanderjsingleton/snap/bitcoin-core/common/.bitcoin/blocks /media/alexanderjsingleton/SEAGATE
The secure-copy of the “blocks” folder will require about four hours. After finishing the blocks-folder transfer, secure-copy the “chainstate” folder located within the same file-path by running:
sudo scp -r /home/alexanderjsingleton/snap/bitcoin-core/common/.bitcoin/chainstate/media/alexanderjsingleton/SEAGATE
The “chainstate” file-folder transfer shouldn’t last longer than 30 minutes. Upon completion of transferring both of the “blocks” and “chainstate” folders to the 1 TB external-usb hard-drive, set it aside until after preparing the Raspberry Pi 3/B+ with Ubuntu Server as detailed in the below instructions.
Download and Install Ubuntu Server for Raspberry Pi 3/B+
- Go to Ubuntu and download Ubuntu Server for Raspberry Pi 3 (scroll-down the page and click on link “Ubuntu Server image for Raspberry Pi 3”).
- Download The Unarchiver tool (available for free download at the Apple App Store) to unpack the image file “ubuntu-18.04.3-preinstalled-server-arm64+raspi3.img.xz” so it formats to “ubuntu-18.04.3-preinstalled-server-arm64+raspi3.img.xz” to burn on the Samsung MicroSDXC.
- Input Samsung EVO-select MicroSDXC to dock and connect to computer via USB; download the appropriate SD-card formatter compatible with your OS to prepare this tutorial at the SD association OR you can use the Disk Utility tool in macOS Mojave- format Samsung MicroSDXC for FAT-32.
- Burning the unarchived Ubuntu Raspberry Pi 3 image-file (n00bs- download and use the balenaEtcher tool.)
- Insert SSD into Raspberry Pi 3 B+
- For Power-Users:
diskutil listsudo diskutil unmount /dev/your-SANDISK-BOOT-Identifier(egsudo diskutil unmount /dev/disk4s1).sudo dd bs=1m if=ubuntu-18.04.3-preinstalled-server-arm64+raspi3 of=/dev/disk4 conv=sync- You can use the shortcut Ctrl + T to check the progress of the write process.

Prepare Raspberry Pi 3/B+ for Ubuntu Server Install
- Insert SSD containing burned Ubuntu Server ISO-file into Raspberry Pi.
- Turn-on Raspberry Pi.
- After configuring Raspberry Pi user-authentication credentials, run the following commands to update the the Ubuntu Server environment (default Ubuntu Server username is “ubuntu” and default password is “ubuntu”; you will be prompted to enter a new password).
sudo apt-get update.sudo apt-get upgrade.sudo reboot.- For the sake of InfoSec, set-up an easy firewall for the Raspberry Pi 3+ in Ubuntu Server by running
sudo apt install ufw, followed by the sequence of commands below:sudo ufw allow 8333 comment "Bitcoin mainnet"sudo ufw enable- Then recommend rebooting with
sudo reboot
- Lastly, you can skip this step if you don’t plan to remotely access this device on your network, but may be a good idea to prepare just in case:
- Run
ifconfig -ato list the host-IP address. sudo apt-get install openssh-serversudo ufw allow 22sudo reboot
- Run
- After running the above commands here in step-8 and then rebooting, you will have the option to remotely access this Raspberry Pi 3 B+ from another computer on network, which will be required if you’re unable to synchronize your full-node by limiting the memory-cache on-board; basically, you will be forced to download and run a full-node briefly on another computer attached to your network and after a complete download, secure copying it from one terminal to another- please proceed to secure copy below if that becomes the case.
- Next, secure root-access by running
sudo passwd rootand then type a new password (please note you will now use this as the username “root” as the designated username along with its password to be entered). - Next type
exitand hit the Return-key; then log-in using “root” as the username and the corresponding password entered. - Lastly recommended mod is to rename the host/device home-name by running the following command according to the syntax:
usermod -l -d /home/ -morsudo usermod -l newUsername oldUsernameand changing the host/device name to an identifiable name to easily access on-network by running (e.g.)sudo hostnamectl set-hostname raspberrypi3.
Install Bitcoin Core on the Raspberry Pi 3/B+
sudo apt-add-repository ppa:bitcoin/bitcoinsudo apt-get updatesudo apt-get install bitcoind- After running the aforementioned commands, you must configure your router for port-forwarding at your Raspberry Pi local-IP address- to that run,
ifconfig -a. - Note the local/host-IP address for the Raspberry Pi after running the previously mentioned command and access the “Port-Forwarding” options within your router and set the local/host-IP address to forward at port: 8333 (this does require some technical expertise about your local-network infra/InfoSec- only proceed if you’re comfortable and knowledgeable about your network topology).
- Now plug-in the 1TB external hard-drive containing the “blocks” and “chainstate” folder; the USB external USB hard-drive must be mounted from “root” access/username.
- Run
ls -l /dev/disk/by-uuid/; that command should return something resemblinglrwxrwxrwx 1 root root 10 Aug 30 17:25 BDA0-BFFC -> ../../sda1; that “sda1” at the end of the markdown is the identifier for the USB-drive, so take note of it for later. - Now assign permission to access the USB-identifier by running the following commands in sequence
sudo mkdir /media/usbsudo chown -R root:root /media/usbsudo mount /dev/sda1 /media/usb- To unmount the USB-drive, run
sudo umount /media/usb
- To unmount the USB-drive, run
- In the Raspberry Pi 3 + Ubuntu Server terminal, run
pwd; it should return a file path within the terminal output (e.g./home/ubuntu/).ls -ato access the hidden files contained within the default directory (assuming that’s where you downloaded it as instructed by this tutorial)- it should appear as ‘.bitcoin’ within the directory, so to access runcd .bitcoin, which is where the “blocks” and “chainstate” folders are stored or locate the “chainstate” folder-path by runningsudo find / -name "chainstate" -print. - Assuming you’ve successfully located the “blocks” and “chainstate” folders within the Raspberry Pi 3/B+, transfer the “blocks” folder by running
sudo scp -r /media/usb/blocks /root/.bitcoin(again, please note the blocks folder transfer from the external USB-hard-drive to the Raspberry Pi 3/B+ will require at least three hours. - After completing the “blocks” folder, transfer the “chainstate” folder by running
sudo scp -r /media/usb/chainstate /root/.bitcoin; this file-transfer will on require about 30 minutes. - After transferring both of the “blocks” and “chainstate” folders to the Raspberry Pi, you will need to limit the memory required to initially synchronize blocks; to do this, run
bitcoind -dbcache=30or trybitcoind -dbcache=50; once again, sit tight for another several hours and then run asudo rebootupon completion. Now sit-back and relax as your Raspberry Pi downloads all 449,171,859 transactions recorded on the Bitcoin ledger since January 3, 2009 (as of this blog-post). Congrats- you’re well on your way to becoming a Bitcoin first-class citizen in the Undiscovered Country… 🙂 - After successfully transferring updating “blocks” and “chainstate” folders from the other computer on network hosting the completed Bitcoin full-node to the Raspberry Pi 3 +, restart + Ubuntu Server by running
sudo reboot. - After logging-in to Ubuntu Server, you can always start the Bitcoin full-node, simply by running
bitcoind -daemonand safely stop by runningbitcoin-cli stop; other handy commands are listed below:bitcoin-cli -getinfobitcoin-cli getnworkinfobitcoin-cli getwalletinfobitcoin-cli getblockchaininfobitcoin-cli getpeerinfobitcoin-cli getconnectioncount
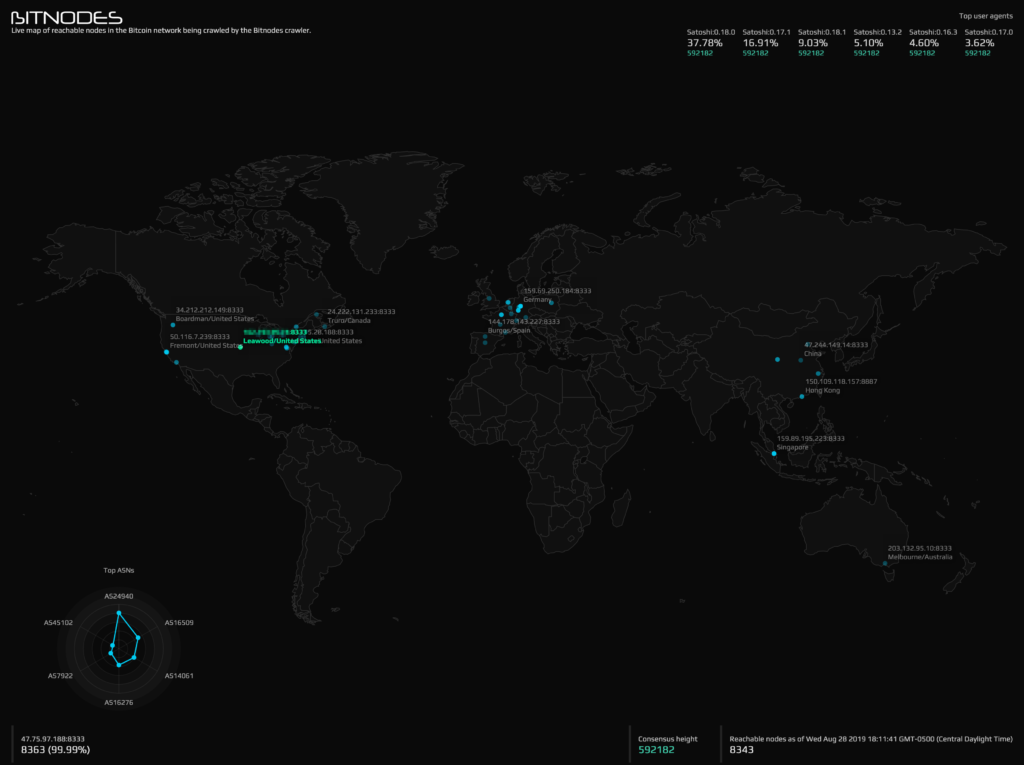
- Confirm that your Bitcoin full-node hosted on your Raspberry Pi 3 + by retrieving your public-IP address by running
curl https://ipinfo.io/ipwithin the terminal and visiting Bitnodes; look beyond the fold of the web-page and your Raspberry Pi public-IP address should automatically populate for verification with port 8333 suffixed- click “Check Node” to confirm success!- For future reference, please note this convenient one-liner via Ubuntu snaps
sudo snap install bitcoin-core(ensure that snapd is installed by first runningsudo updateand thensudo apt install snapd) . - Alternatively. Bitnodes also offers a convenient one-line for downloading and installing
curl https://bitnodes.earn.com/install-full-node.sh | shbut since this is a tutorial-demonstration, it’s probably better to proceed with this tutorial first to understand the process before installing the convenient one-liner.
- For future reference, please note this convenient one-liner via Ubuntu snaps
Optimizing the Raspberry Pi 3/B+
If you elected to download the entire Bitcoin-ledger (aka full-node) on the Raspberry Pi 3 + instead of copying from a more robust computer, you will encounter some network timeouts due to the lack of RAM available on this model. In order to avoid the previously mentioned, proceed with the following installs below
Installing Watchdog
Watchdog is a UNIX/Debian utility to monitor/recover the control of an unstable server by preventing the software from overloading hardware constraints; this will delay the entire download but will be faster in the long-run because watchdog prevents timeouts that require a reboot- simply run sudo apt-get install watchdog. After running the watchdog one-liner, the corresponding configuration file must be modified according to the below specifications. Access the directory (assuming from the Ubuntu-home folder) by running cd /etc/ and then access the watchdog-configuration by running vi watchdog; uncomment lines #watchdog-device and #max-load-1 and then add the following parameter to the watchdog-configuration file watchdog-time = 15 (don’t forget to hit the insert-key because you’re in vim: ). Generally, you should be able to save and exit your configuration file additions within vim by entering the ESC-key + :x but in case you encounter any issues related to user-permissions, save and exit the configuration file via vim by running :w !sudo tee % > /dev/null
cronjobs
In case the Raspberry Pi 3 + containing the Bitcoin full-node fails for whatever reason due to a power-outage or network failure, the device can automatically reboot by setting a cronjob; to this, run crontab -e and add the following line to the file @reboot bitcoind -daemon. Again, typically, you should be able to save and exit your configuration file additions within vim by entering the ESC-key + :x but in case you encounter any issues related to user-permissions, save and exit the configuration file via vim by running :w !sudo tee % > /dev/null.
The cronjob approach as detailed above is much easier, but if power-users are so inclined, you can create your own ‘bitcoind.conf’ file within the /etc/init.d-path and add the following script- just ensure that the “user” (appearing first as “user=bitcoinuser” within the below-script correctly corresponds to the Ubuntu Server environment name- by default it’s “root” or “ubuntu” in Ubuntu Server for Raspbery Pi 3).
description "bitcoind"

start on filesystem
stop on runlevel [!2345]
oom score -500
expect fork
respawn
respawn limit 10 60 # 10 times in 60 seconds

script
user=bitcoinuser
home=/home/$user
cmd=$home/bin/bitcoind
pidfile=$home/bitcoind.pid
# Don't change anything below here unless you know what you're doing
[[ -e $pidfile && ! -d "/proc/$(cat $pidfile)" ]] && rm $pidfile
[[ -e $pidfile && "$(cat /proc/$(cat $pidfile)/cmdline)" != $cmd* ]] && rm $pidfile
exec start-stop-daemon --start -c $user --chdir $home --pidfile $pidfile --startas $cmd -b -m
end script```
Alternatively, you can run a wget for the upstart-script from the Bitcoin Core source-tree sudo wget https://github.com/bitcoin/bitcoin/blob/2d782ab2ce30bf106e34cd3288c9082ac04022f9/contrib/init/bitcoind.conf
2 comments for “How to Run a Bitcoin Full Node on a Raspberry Pi 3/B+”