

So what’s the moral of the story? Well, you better trust your home-theatre guys know what they’re doing- even if they are the nicest guys in the world and everything works just fine in front of your eyes.
WTF is Dynamic DNS and why is it important? In an effort to make this ostensibly obscure blog-post a bit more relatable, let’s sex this topic up a bit, otherwise, it would probably make everyone’s eyes glaze-over- even for most inside of Tech.
Suppose you’re a middle-aged, married suburban male expecting to raise your family with your darling wife in a newly purchased house located in a respectable part of town; you take all of the necessary precautions to protect your family and your privacy by installing a state of the art alarm system, Ring Doorbell, and even a surveillance system that’s equipped with over 10 lip-stick cameras to prevent getting cucked by the neighborhood milk-man or pool-boy while you’re at work or out of town. You have all of the aforementioned installed by legitimate, certified-professionals; you can even retrieve your surveillance-system footage from your iPhone while hitting balls at the range- everything works just fine, so what could go wrong?

Well, let’s say those delightful home-theatre guys who are specialists in home-theatre installation equipment now offer to provide a la carte services like home-networking because even your flat-screen can connect to the World-Wide-Web nowadays- and so what if they don’t exactly know every best-practice in network-engineering and information-security? These home-theatre guys can get everything to work in front of your eyes- because that’s all that matters, right? WRONG! Let’s say the home-theatre guys bundled all of the audio/video (A/V) equipment along with the rest of your computers in your home on the same router in addition to connecting another Wi-Fi router behind the main-router so each piece of equipment can seamlessly communicate with each other, especially on the Apple Ecosystem, instead of connecting that Wi-Fi router to a separate, dedicated connection on the modem, which is considered best-practice.
Ordinarily, nobody would care about this set-up- but let’s say you’re suddenly a young-buck on the up-and-up at your local corporate ladder in town and you’re becoming a target of corporate-espionage- think Billions on Showtime. Suppose your corporate opponents hire cyber-mercenaries to observe your life- track your daily habits wherever you live, work and play in an effort to seek any technical-vulnerabilities they can exploit. After spamming you with email for links to exploit on your laptop or smart-phone, they might try to seek other vulnerabilities wherever you log-in by spoofing your network from outside, like from a laptop within a nearby car or a non-descript van, just waiting for you to attempt to log-in on the spoofed network by mistake so the hackers can snatch the hashed WPA-2 keys and PMK-ID hashes for SSID intended for your actual home-network Wi-Fi router. After collecting the WPA-2 keys and PMK-ID hashes with the previously mentioned “honeypot” and decrypting them with something similar to a Bitcoin mining rig (like the one depicted below) and assuming these hackers are worth their own salt, they can access your Wi-Fi router from nearby by worming into your entire network -backwards- and into all of the devices connected to your main-router; you’re now a sitting-duck on your home-network. These hackers can now access your surveillance system from the outside; they don’t even need to try to bribe, or socially-engineer, the home-theatre guys who set-up the surveillance system because even they maintain copies of the Dynamic DNS credentials that enables you to check on your home on your iPhone while you’re away at the clubhouse.
So what’s the moral of the story? Well, you better trust your home-theatre guys know what they’re doing- even if they are the nicest guys in the world and everything works just fine in front of your eyes. The best practice in this case would’ve been to create a separate Wi-Fi network outside of the main-router connecting your home-network and A/V equipment. The Dynamic DNS credentials that are used to access your surveillance system are not only maintained by the home-theatre guys but other third-parties- so this data is easily accessible by third-parties, hacks or even a bribe.
So how do we protect ourselves in the age of Bitcoin? Well, we can start with using cryptographic-tools like those provided by Tor Hidden Services and host home devices via the dark-web with onion-routing using hashed private and public-keys curated and maintained by you– not another third-party who could probably care less about you except for their fees. Believe it or not, the Dark Web can actually be safer and more secure than the “World Wide Web,” according to Google’s index, which is only about 10% of the entire Internet.
This tutorial is a mash-up of tutorials derived from this blog, the LINUX Journal and another tutorial by Murray Royston-Ward; it will only require a few parts listed below:
- Raspberry Pi 3 (or greater)
- 16 GB MicroSD
- Monitor
- Keyboard and Mouse
- CAT 5E/6 Cable
This tutorial will show you how to set-up Tor Hidden Services to host a basic web-site- as eloquently described by this Stack Exchange post, you don’t need any open incoming port-forwarding to run a Tor hidden service, or even really worry about NAT. You certainly don’t need a Dynamic DNS provider because the Tor peers connect to Tor relays with a .onion address to propagate through the distributed Tor hash-table; Tor peers build circuits to the so-called “rendezvous” point – so it has an initiated connection (which means you only need an outgoing connection, not necessarily an additional incoming connection) while it maintains and receives data through these circuits with the Tor rendezvous points.
This demonstration creates a very basic “Hello, World” website hosted via Tor Hidden Services with a Raspberry Pi 3 running KALI-LINUX. Please proceed with the process as detailed below- beginning with the KALI-LINUX download and install for the Raspberry Pi 3.

Download KALI-LINUX for Raspberry Pi Install
- Go to Offensive Security and download go to Offensive Security and select “Raspberry Pi” (scroll-down the page and click on link “Raspberry Pi” for the drop-down menu and download the compressed .img file (non-64-bit) for Raspberry Pi 2,3,4; please note, you can also proceed below with Ubuntu Server if so inclined).
- Download The Unarchiver tool (available for free download at the Apple App Store) to unpack the image file “kali-linux-2019.3a-rpi3-nexmon.img.xz” so it formats to “kali-linux-2019.3a-rpi3-nexmon.img” to burn on the Samsung MicroSDXC.
- Input Samsung EVO-select MicroSDXC to dock and connect to computer via USB; download the appropriate SD-card formatter compatible with your OS to prepare this tutorial at the SD association OR you can use the Disk Utility tool in macOS Mojave- format Samsung MicroSDXC for FAT-32.
- Burning the unarchived KALI-LINUX Raspberry Pi 3 image-file (n00bs- download and use the balenaEtcher tool).
- Insert SSD into Raspberry Pi 2
- For Power-Users:
diskutil listsudo diskutil unmount /dev/your-SANDISK-BOOT-Identifier(egsudo diskutil unmount /dev/disk4s1).sudo dd bs=1m if=kali-linux-2019.3a-rpi3-nexmon.img.xzof=/dev/disk4 conv=sync- You can use the shortcut Ctrl + T to check the progress of the write process.
- If you’re unfamiliar with command-line syntax, check-out explainshell.com and copy/paste the commands herein to understand what they execute.
Prepare Raspberry Pi for KALI-LINUX Install
- Insert SSD containing burned Ubuntu Server ISO-file into Raspberry Pi.
- Turn-on Raspberry Pi 3.
- After configuring Raspberry Pi 3 user-authentication credentials, run the following commands to update the the KALI-LINUX environment (default KALI-LINUX username is “root” and default password is “toor”; you will be prompted to enter a new password).
sudo apt-get update.sudo apt-get upgrade.sudo reboot.- For the sake of InfoSec, set-up an easy firewall for the Raspberry Pi 3 in Ubuntu Server by running
sudo apt install ufw, followed by the sequence of commands below:sudo ufw allow 8000 comment "TOR-circuit"sudo ufw enable
- Then recommend rebooting with
sudo reboot
- Lastly, you can skip this step if you don’t plan to remotely access this device on your network, but may be a good idea to prepare just in case:
- Run
ifconfig -ato list the host-IP address. sudo apt-get install openssh-serversudo ufw allow 22sudo reboot
- Run
- After running the above commands here in step-8 and then rebooting, you will have the option to remotely access this Raspberry Pi 3 from another computer on network, which will be required if you’re unable to synchronize your full-node by limiting the memory-cache on-board; basically, you will be forced to download and run a full-node briefly on another computer attached to your network and after a complete download, secure copying it from one terminal to another- please proceed to secure copy below if that becomes the case.
- Next, secure root-access by running
sudo passwd rootand then type a new password (please note you will now use this as the username “root” as the designated username along with its password to be entered). - Next type
exitand hit the Return-key; then log-in using “root” as the username and the corresponding password entered. - Lastly recommended mod is to rename the host/device home-name by running the following command according to the syntax:
usermod -l -d /home/ -morsudo usermod -l newUsername oldUsernameand changing the host/device name to an identifiable name to easily access on-network by running (e.g.)sudo hostnamectl set-hostname onionpi. - In order to avoid any confusion with root-privileges and for the sake of best practice since this device/host will be making outbound connections with the dark-web, add a username within the “sudoers” group by running the following commands in sequence:
user add -m your-additional-usernamepasswd your-additional-usernameusermod -a -G your-additional-usernamechsh -s /bin/bash your-additional-username
Installing Tor Hidden Services
After starting the Raspberry Pi 2 with KALI-LINUX, simply install Tor with the one-liner as explained within the Tor community-docs: sudo apt-get install tor. Please be advised, this will take some expertise and experience with web-servers but you’ll be just fine if you follow along exactly as explained. After the install, proceed exactly as outlined below within previously mentioned Tor-docs to enable Tor Hidden Services within the Tor torrc-config file by running sudo vi /etc/tor/torrc.
- After running the command to access the Tor config file (torrc), scroll-down to the commented header,
### This section is just for location-hidden services ### - Uncomment these lines; however, please note, for this tutorial you need to ensure that whatever port you choose is already available on your network router- in this case, we’ll suggest port 8000, so uncomment and edit these lines accordingly within the torrc file:
HiddenServiceDir /var/lib/tor/hidden_service/
HiddenServicePort 80 127.0.0.1:8000

HiddenServiceDir /var/lib/tor/hidden_service/ssh
HiddenServicePort 22 127.0.0.1:22
The first block including the HiddenService 80 will bind that virtual-port as proxy-port to the Tor Network with your router port number 8000 but there is no need to configure the Raspberry Pi for port-forwarding because that’s the beauty of Tor Hidden Services: you don’t need to open any ports for inbound-connections, only outbound; remember, Tor peers build circuits to the so-called “rendezvous” point – so it has an initiated connection and maintains the connection through these circuits with the rendezvous points.
127.0.0.1 specifies the proxy internal connections. When we set up the web server this means it will proxy the sites we set up through Tor and 8000 is what we’ll set the web-server to relay to broadcast our very basic website via Tor Hidden Services with an .onion address. Also, we’ve created a path to remotely access this Raspberry Pi terminal via secure-shell with an onion-address- additional information will be provided later.
Now run sudo service tor restartcd /var/lib/tor/hidden_service/. Concatenate the ‘hostname file’- that will display your host onion-address, which will resemble something like the following:
a6eaxqknxv2ojcjt5hbmvxi7lx3k4orgliwxyg4tdct7vpr56rvq6nad.onionThere are two additional files within the ‘hidden_service’ for our dedicated port 8000, which include ‘client_keys’ and “private_key”- just note these and set aside; however, if you access the next directory specified for port-22 or secure shell access, that subfolder will contain the autogenerated .onion address (similar but different than the one above) and a corresponding pass-phrase to access via SSH from the command-line- DO NOT RELEASE THOSE CREDENTIALS and be sure keep them private. We’ll revisit SSH access via Tor Hidden Services Onion Address in an updated post.
Raspberry Pi Web Server
Evidently, Tor does not recommend Apache web-server due to complexity and potential for security leaks so we’ll be using a light-weight web-server called lighttpd– on the next run, we might revisit this tutorial with nginx.
Create two additional folders within a standard LINUX- html directory (ie /var/www/html by running:
sudo mkdir /var/www/htmlsudo mkdir /var/www/html/fubar
Next, modify the permissions of the folder according to additional username/account created for KALI-LINUX, not the root-user by running the following commands in sequence to access rules for localhost:
sudo chown -R your-additional-username:www-data /var/wwwsudo chmod -R 755 /var/wwwsudo usermod -a -G www-data your-raspberry-pi-host-name
Lastly, we’ll chevron basic HTML for our test into a basic ‘index.html’ file by running:
echo '<h1>Hello, Dark-Web!</h1>' > /var/www/html/fubar/index.html
Now we edit the default lighttpd configuration file by running sudo nano /etc/lighttpd/lighttpd.conf
server.document-root = "/var/www/html"
Next change the ‘server.port’ line to read:
server.port = 8000
Lastly, set Tor hidden_service/hostname .onion address according to the following convention.
$HTTP["host"] == "your-onion-address" {
      server.document-root = "/var/www/html/fubar"
}
A correctly modified lighttpd configuration will resemble like the example provided below for this tutorial:
server.document-root = "/var/www/html"
server.upload-dirs = ( "/var/cache/lighttpd/uploads" )
server.errorlog = "/var/log/lighttpd/error.log"
server.pid-file = "/var/run/lighttpd.pid"
server.username = "www-data"
server.groupname = "www-data"
server.port = 8000
$HTTP["host"] == "a6eaxqknxv2ojcjt5hbmvxi7lx3k4orgliwxyg4tdct7vpr56rvq6nad.onion" {
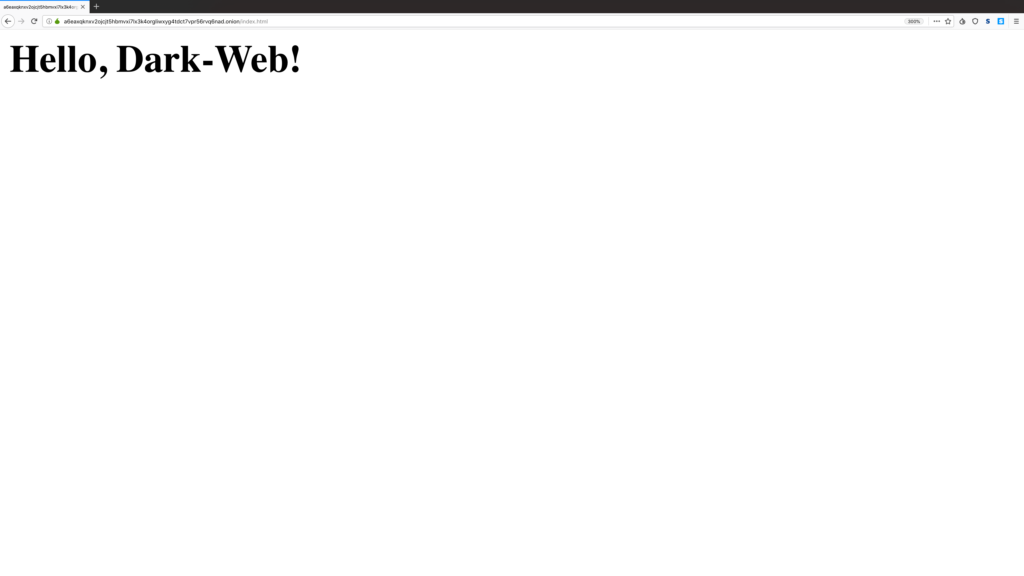
server.document-root = "/var/www/html/fubar"Now, the server.document-root should vector where the “fubar” file-folder is located and we’re ready to test the server by running sudo service lighttpd restart. We’ve already opened the appropriate ports within UFW, so fire-up the local-browser within KALI-LINUX and check-out http:localhost:8000/index.html; a basic “Hello, Dark-Web!” text should appear on the web-page as expected. If such is the case, go to another computer on your network and try to access that web-page via the .onion address appended with the ‘index.html’ file- e.g:
- http://a6eaxqknxv2ojcjt5hbmvxi7lx3k4orgliwxyg4tdct7vpr56rvq6nad.onion/index.html
A successful demonstration will resemble the below screenshot- congrats!
Conclusion
This tutorial will be revisited with a few additions in the not too distant future including information to access the Raspberry Pi via SSH over the Tor Hidden Services protocol and a demonstration with nginx web-server.

Again, the most important takeaway here is that the Tor Hidden Services .onion address can relay information to the outside world without requiring any port-forwarding and accept inbound connections with cryptographic hash-keys that aren’t maintained by a centralized authority like Dynamic DNS providers; basically, you become responsible for data that is yours to begin with and not subject to hacks- either socially-engineered or from the command-line; just enjoy, folks.